There was no absolute necessity for Turkey to enter into the Great War and certainly it was debatable right up to the Allies declaration of war whether or not Germany would succeed in bringing Turkey in against the allies. Much of the blame can be laid at the diplomatic mismanagement exercised by the British and French in the preceding years, during which time Germany succeeded in infiltrating and directing Turkish policy.
The eight month campaign in Gallipoli was fought by Commonwealth and French forces in an attempt to force Turkey out of the war, to relieve the deadlock of the Western Front in France and Belgium, and to open a supply route to Russia through the Dardanelles and the Black Sea. The Allies landed on the peninsula on 25-26 April 1915; the 29th Division at Cape Helles in the south and the Australian and New Zealand Corps north of Gaba Tepe on the west coast, an area soon known as Anzac Cove. On 6 August, further troops were put ashore at Suvla, just north of Anzac, and the climax of the campaign came in early August when simultaneous assaults were launched on all three fronts. The aim of the Suvla force had been to quickly secure the sparsely held high ground surrounding the bay and salt lake, but confused landings and indecision caused fatal delays allowing the Turks to reinforce and only a few of the objectives were taken, with difficulty. The peninsula was abandoned over the period of Christmas 1915. The campaign cost the British and Commonwealth forces 205,000 casualties, the French 47,000 while the official figures on the Turkish side amounted to 251,309 killed, wounded, missing , sick or died of disease. Turkey emerged triumphant from the victory and the war against her continued in Egypt, Mesopotamia and Palestine.
There was no particular reason before the war why Turkey, if she entered in a war at all, should have been allied to Germany and Austria rather than to the Entente. It was simply a matter that German influence in Constantinople had gained the upper hand over British and French diplomacy: this was an obvious mistake since it had been a consistent policy since the Crimean War for Britain to preserve the ramshackle Ottoman Empire in order to prevent Russia from absorbing any part of it, and more particularly to control the Straits - the entrance to the Bospherous and the Black Sea via the Dardanelles. Germany had begun to develop an interest in the area from the 1880s, challenging the British control of the Suez Canal and casting envious eyes on India. The first step Germany took was to complete a direct rail link from Berlin to Constantinople, leading eventually to the prospect of continuing the line to Baghdad. At the same time a small German military mission to Turkey was expanded. The Turkish Empire was slowly breaking up, and the process seemed to be inevitable. In 1898 war broke out between Turkey and Greece, as a result of which Turkey lost Crete and the Aegean islands. In 1903 Macedonia rebelled against Turkish rule. National humiliation at these setbacks resulted in the formation of a new political group, the Young Turks, led by two army officers Enever and Djemal Pasha, and Taalat Bey a postal official. A military coup in 1909 deposed the Sultan and installed his brother, whom the Young Turks controlled, but who continued to exert nominal rule. Further humiliations followed with the loss of Bulgaria in 1908 and Austrias annexation of Bosnia-Herzegovina, and in January 1913 the Young Turks finally seized full power. They now looked for European support to rebuild the Turkish state: Britain hesitated, but Germany seized its chance. Churchill, First Lord of the Admiralty, recommended an alliance but was overridden by Grey, the Foreign Secretary. Thus in 1913 the first contingent of seventy German officers arrived to expand the military mission and to modernize the Turkish army. Britain could respond only but sending a naval mission to reorganize the antiquated Turkish fleet. Such was the situation on 28th June 1914 when the Serb nationalist Gavrilo Princip shot the Austrian Archduke Franz Ferdinand in Sarajevo. On that same day Churchill cancelled the delivery of two dreadnought battleships the Turks had commissioned to be built on the Tyne and requisitioned them for the British navy, and it was this action that finally precipitated the Young Turks to declare for Germany with a treaty on 1st August. On August 2nd Turkey mobilized but announced her neutrality in the event of hostilities. German immediately presented Turkey with two of her own ships, the Goeben, a battle cruiser and her escort the Breslau a light cruiser. The two ships ran through the Dardanelles and anchored off Constantinople to scenes of wild delight. Thus encouraged to join the side that appeared to be the obvious winner, on 31st October Turkey declared war on Russia and entered the European conflagration.
Greece had joined the allies on 12th August. Russia immediately devised a plan to attack the Dardanelles, provided Greece was prepared to land an army on the Gallipoli peninsula, a move which would then open the way for an attack by the British fleet through the Straits to capture Constantinople and quickly knock Turkey out of the war. Turkey, however, had already mined the Straits and put mobile guns in the forts along the length, particularly in the narrows, so this first plan was regarded by the navy as impractical. However, by New Year 1915, with stalemate on the Western Front already quite obvious, Churchill proposed reconsidering the idea. The Admiral of the Fleet, Sir John Fisher was enthusiastic. His plan was to put a Greek force on the peninsula, a British force on the Asiatic side of the Straits at Kum Kale, and send a force of old British battleships to force their way through the minefields up to Constantinople. The Greeks however had already given up the idea, and Lord Kitchener refused to send forces out of France. Churchill persisted with a revised plan - to land a small British force on the peninsula, taking over the forts one by one as they were destroyed by the navy, and combine this assault with the landing of a smaller French force on the Asiatic side while the big battleships forced their way through the Narrows up to Constantinople. For this part of the plan aerial reconnaissance, then in its infancy, would be needed and much stronger ships to destroy the forts: the brand-new Queen Elizabeth was offered by Fisher who planned to calibrate her massive 15 inch guns using the forts as target practice. Fisher, however, then began to have second thoughts, but Churchill persisted with the idea and sent two Royal Marine Battalions from the Royal Naval Division to be ready to land and secure the forts as they were demolished. Kitchener finally agreed to send the 29th Division, the last available forces left in England, as a reserve in case of need, to the island of Lemnos, forty miles west of Cape Hellas, which would provide a convenient base area, while French troops would join them from North Africa. A start was made to put the plan into effect, and on 19th February the two forts at the entrance to the Straits were bombarded but not entirely destroyed. It took until 25th February to clear the entrance completely. Meanwhile Kitchener changed his mind again about the 29th Division and ordered Australian and New Zealand forces in Egypt to move instead. The original plan was now changed by Kitchener to use these troops not merely to garrison the forts, but if necessary to attack them from the rear. This in turn was overruled by Lt.-General Sir William Birdwood, commanding the Australian and New Zealand Army Corps , the so-called ANZAC forces, who realized that a much more detailed plan was required to take the whole peninsula, and then hold it as a base for an advance on Constantinople. Thus by a series of steps forward and sometimes backwards the outlines of the eventual Gallipoli campaign gradually took shape.
The difficulties faced by the navy in attempting to force the Straits were immense. The only minesweepers available were converted trawlers which lacked power against the strong currents and had to work upstream before sweeping downstream. Inevitably, many were sunk attempting this almost impossible plan. They faced a double barrage from the forts and of course the mines themselves. In face of failure Kitchener was persuaded after all to send the 29th Division, under the command of Sir Ian Hamilton, senior to Birdwood, and a veteran of the Boer War. Hammilton received no plan, no detailed instructions, no clear objectives and no maps, being merely told by Kitchener that we are sending a military force to the Dardanelles to support the navy and you are to have command. Meanwhile, the naval force was now under the new command of Vice-Admiral John de Robeck who launched a renewed attack on 18th March, with three lines of battleships and a fleet of trawlers. The result in lost and damaged ships was a complete disaster, and in face of the danger to our ships the Queen Elizabeth, the key to the whole operation, was withdrawn, together with most of the modern remaining battleships and battlecruisers. Only land forces could now secure the Straits, but by now the Turks were to be given every opportunity to prepare their defenses while Hamiltons plans took shape. The German general, Liman von Saunders was appointed to prepare for the coming invasion.
Hamiltons forces assembling on Mudros were inadequate for the tasks that were to be assigned to them, an amphibious assault on a well defended and rugged terrain. The ANZACs were still training in Egypt, there were as yet no available landing craft, and Hamilton had received no administrative or logistical staff. Plans developed slowly for a landing on 29th April - a main assault by the 29th Division on either side of Cape Helles at the tip of the peninsula, a second attack by ANZAC forces on the beaches north of Gaba Tepe, 12 miles north of Helles, and a French landing at Kum Kale on the Asiatic side. There was also to be a diversionary attack at Bulair on the neck of the peninsula, aimed at confusing the Turks and preventing their sending reinforcements to Cape Helles. Troops were to be ferried ashore in rowing boats towed by steam pinnaces, while an old collier, the River Clyde with holes cut in her sides was to be beached full of troops direct onto the Helles beach. Eighteen elderly battleships, twelve cruisers and twenty-nine destroyers would provide artillery support. From the very first things went badly wrong. Bad weather delayed the landings by two days. (Footnote: it was during this delay that Rupert Brook the war poet and Edwardian hero, serving with the Royal Naval Division, contracted blood poisoning and died on a French hospital ship.) A muddle on landing resulted in the ANZAC force being put ashore on the wrong beaches of Ari Burnu and at ANZAC Cove to the right, two equally impossible areas, where the troops faced not a gentle rise but steep and impossibly difficult terrain to assault. There was as yet no artillery, and because the troops were now in the wrong place the navy could not offer support in case of killing our own men. The ANZACs lost 2000 men on the first day. Wounded could not be evacuated until dark and the two hospital ships were in any case filled at soon as any attempts were made to do so.
The landings at Cape Helles were equally confused and disastrous. The landings were planned to put the 29th Division ashore in five places : V beach to the east of the cape, W to the west, X two miles further north on the west coast, and Y, two miles beyond that. A further diversionary landing was to take place at S beach, on the east coast. The first landing, on Y beach was undefended. The troops reached the cliff top, and with no further orders simply sat down to wait. The undefended village of Krithia, a mere 500 yards away, was not taken. On S beach the landing also went well, with objectives secured at the price of 63 casualties. X beach was defended by only 12 Turkish soldiers, and was immediately secured. The troops were then supposed to link up at once with the landing on W beach, and this they attempted to do. However, the landings at V and W beaches ran into immediate trouble. Both were flanked with 150ft high cliffs and were defended with machine guns, barbed wire and mines. The 1st Lancashire Fusiliers were slaughtered as they tried to come ashore on W beach. On V beach where the River Clyde was beached there was an equally appalling situation. Only 300 men out of the 700 who attempted to do so survived to get from the River Clyde onto the beach and aerial reconnaissance reported that the sea had turned red with blood. The few that survived the landing could get no further than a bank only ten yards inland, and here they sheltered until dark when the final battalions could emerge from the River Clyde. Meanwhile, at Y beach the troops had finally come under attack from Turkish reserves and all opportunities had been lost for their effective use in support of V or W beaches. The campaign in Gallipoli never recovered from the initial disasters of the landing. The troops remained pinned down, and in spite of many attempts to break out of the tiny amount of territory gained there and at Cape Helles no real progress was ever made.
The landings at Anzac Cove
It was in order to try and break the deadlock that Hamilton finally devised the plan to land a fresh force north of ANZAC cove, on a suitable beach, apparently undefended, south of Suvla Bay. Three new Divisions were promised, one, the 11th Division, for the Suvla landing and two more to reinforce Birdwood at ANZAC Cove, who planned to launch a simultaneous and coordinated attack on the ridges above the beachhead. Hamiltons original plan was to land the 11th Division on beaches C and B south of the bay. They were then to move inland to seize two hills some four miles away, Tekke Tepe in front and Kiretsch Tepe on the left, that overlooked Suvla Bay itself and also the plain behind. The 10th Irish Division would then follow through to assist Birdwoods ANZACS in capturing the Sari Bair ridge. Thus the landing was planned originally to coincide with and support the Australian advance to take the whole Sari Bair ridge, which commanded the peninsula and which if captured would have opened up the whole way forward. In fact the plan failed completely. The attacks at Gully Ravine, Lone Pine and the German Officers Trench at Battleship Hill to the north of it resulted in the loss of 2000 men including the dismounted Australian Light Horse Brigade at The Nek, an action immortalized in the film Gallipoli. The Light Horse were in their original positions near the Nek and were due to capture the high ground in front of Baby 700, but Birdwood had received no reports that the covering hills of Chanuk Bair and Hill Q had yet been taken. The 8th and 10th Light Horse were ordered forward in the hope that the plan had succeeded: in fact it had not, and Godley, the Brigade Commander knew that an attack would be a suicide mission. To make matters worse, watches were not properly synchronized, so the artillery bombardment ended several minutes before the whistles blew to send the ANZACS over the top, thus allowing the Turkish machine gunners to climb up from their dugouts and get ready for the attack. One Australian officer, walking down the trenches was heard to say Gentlemen, we have ten minutes to live. Half the Brigade were killed or wounded in the matter of a few minutes. Similar disasters occurred right across the front. Birdwoods plan to secure the whole Sari Bair ridge had failed, and no help had been forthcoming from the Suvla Bay landings. In all the history of the Great War with its many disasters and lost opportunities, the landings at Suvla Bay must come high on the list as one of the worst fiascoes in the history of the British army. Hamilton had asked for one of the two the best Lieutenant-Generals on the Western Front to command both the landing and the whole operation, either Sir Julian Byng or Sir Henry Rawlinson. In the event Kitchener sent Sir Frederick Stopford, who had been retired for four years, had been employed as Constable of the Tower of London, and who had no knowledge of the Gallipoli terrain, no up-to-date experience of military tactics and no understanding whatever of an amphibious landing. He was chosen solely on the basis of seniority, a code of military practice that had been enshrined for over a century in the officer corps.
Stopford quickly decided that the first small hills, Chocolate Hill, Green Hill and W Hills could not be captured immediately without artillery support, so that the plan for rapid progress, capturing the hills by moonlight after the initial landing, would have to be delayed 24 hours. This in turn meant that the landing would have to be in Suvla Bay itself and the hills would be attacked from the north. The original plan now became a disaster in the making and Hamilton must be blamed for weakly accepting it, against his better judgment. The whole plan, in fact, had been entirely changed. Instead of a landing concerned primarily with supporting Birdwoods attempt to capture the Sari Bair ridge by moving up the gullies that led to Hill 60 and beyond, Stopfords sole priority was to establish a secure beachhead as a base for further operations. Hamilton and Stopford were now working on an entirely different basis. Meanwhile, the Turks of course had noticed the arrival of two new Divisions at ANZAC Cove and immediately strengthened the defenses at Suvla with four infantry battalions, a cavalry squadron, and 19 guns, their forward positions being on the Kiretsh Tepe ridge with a forward position on Hill 10 covering A beach in Suvla Bay and at Lala Baba covering B and C beaches south of it. A further difficulty was that Suvla Bay itself had not been properly charted by the Admiralty which meant that the supporting capital ships and the hospital ships would not be able to come close in to shore.
The navy reluctantly gave way, and the 11th Division prepared for the initial landings. The troops embarked on 10 Destroyers, each towing one special motor landing craft equipped with bow doors, which it would release as close to the shore as possible at 21.25 hrs on 6th August . Several journeys to and from the ships would be required, so that the troops would land in waves on the beach. The 34th Brigade was to land on A beach, now designated within Suvla Bay, at a place called The Cut, north of the mouth of the Salt Lake, with the task of taking Hill 10 and advancing beyond to the ridge of Kiretch Tepe, with the second wave passing through ready to attack Chocolate Hill as soon as possible. 32nd Brigade would land on B beach, south of the bay and the salt lake. The troops were to move round southern part the Salt Lake, which nobody actually realized was dry at that time of year, presenting no obstacle whatever to a direct movement forward, and capture the defences at Lala Baba, at the south-west corner of the Salt Lake. Here they were to consolidate, and support the attack on Chocolate, Green and W Hills in broad daylight the following morning after an artillery barrage. 33rd Brigade would land later at B beach and act as a divisional reserve. At first light the 10th Irish Division was due to land on A beach. The plan was cumbersome and unnecessarily over-cautious. Stopford himself chose to embark in a small sloop with inadequate signaling facilities, making it impossible for him to exert control.
There was no opposition at B beach and by midnight, despite heavy casualties, Lala Baba had been secured, and 33rd Brigade was ashore. A beach was more of a problem. The three destroyers ran into shoals, anchored too far out, so that the leading battalions were landed south of The Cut instead of north, and struggled in deep water. However, one battalion actually reached the Kiretch Tepe ridge by 03.00. The other, the Lancashire Fuliliers got lost and could not find Hill 10 in the dark, pinned down by snipers. The remainder of the Brigade had not arrived as the landing craft were grounded and could not return to the destroyers. Meanwhile two battalions of 32nd Brigade simply waited on the beach for orders as did their other two battalions with 33rd Brigade at Lala Baba. Eventually, on their own initiative, four platoons were sent off to assist the Lancashire Fusiliers at Hill 10. Following its capture in the early morning, instead of moving off to capture Chocolate and Green Hills, they all moved off to join the Manchesters at Kiretch Tepe. The 10th Irish Division now arrived, with their orders changed to now land on C beach, south of The Cut. Half way through the operation orders were changed again to land instead north of The Cut, so that the Division finally arrived with its two Brigades, 30th and 31st, in different places.
Hours of confusion and delay resulted within the entire force. Stopford had hurt his knee and refused to disembark from the sloop, thus placing himself entirely unable to command. Eventually 31st Brigade set off to support the attack on Chocolate and Green Hills, moving quite unnecessarily round the perimeter of the completely dry Salt Lake. Chocolate and Green Hills were taken, but instead of moving on to the all-important W Hills, the troops dug in. Two battalions of 33rd. Brigade were then withdrawn into reserve at Lala Baba. The remainder finally made their way to join the Manchesters at Kiretch Tepe. By the end of the first day divisions and brigades were hopeless muddled and confused, Kiretch Tepe had not been taken, and the men were weary, confused, hungry and desperately thirsty as the arrangements for a water supply had completely broken down. Hamilton was furious and impatient: he had received no news from Suvla and the news from ANZAC and Cape Helles (another diversionary attack) was very bad.
The following day a line was formed joining Chocolate Hill to Kiretch Tepe. Stopford, who was still on his sloop, ordered no further attempts at an advance, not even to capture Tekke Tepe, where later aerial reconnaissance reported that no Turkish troops had remained. 10th and 11th Division now proposed to wait until morning for a further advance to capture Tekke Tepe, W Hills and the remainder of the Tekke Tepe spur. Hamilton finally got ashore to try and make use of what chances remained. The attack on Tekke Tepe only got going at 04.00 by which time the troops were completely disillusioned and morale was very low. The attack, so long delayed, now coincided with the arrival of fresh Turkish troops. W Hills could not be captured, and no help could be given to the left flank of the ANZACS. The Kiretch Tape ridge could not be secured.
Stopford finally came ashore on the 9th, and spent the day supervising the construction of his personal dug-out on the beach. Totally out of touch with the situation he airily ordered an attack on Scimitar Hill (north-east of Green Hill) by an Irish Brigade, without any clear plan or timing. The 33rd Brigade, mostly still on the beach, could have given support but were not ordered to do so, and by now many of the men had drifted away and some were actually in hiding in the area near the 31st Field Ambulance near A beach. The result was a total and costly failure. Reinforcements were landed, the 54th East Anglian Division, but instead of capturing Tekke Tepe and the ridge, Stopford split it up to plug holes in other areas. Finally, after Hamilton had insisted on using the Division as he intended an attack was made, but by now it was far too late and the ridge was heavily reinforced by the Turks. All that could now be done was to consolidate the line as far forward as possible and accept that the whole plan had completely failed, while planning some sort of renewed activity as soon as possible. Realising his failure, but anxious not to be sent home by Hamilton, Stopford ordered one last useless attack on Tekke Tepe with three Irish brigades. Orders were issued only at 08.40 on 15th August for an attack that afternoon. The ridge was reached on the southern side at Kidney Hill, but the brigades were driven back to their start line. It was the end for Stopford who sailed home to spend the next few months trying to explain to the public and the war office that the failure at Suvla was entirely the fault of Hamilton.
Byng, whom Hamilton had requested in the first place, and with whom the result of the Suvla landing might have been very different, was finally chosen to replace Stopford. In the interim, de Lisle from the 29th Division was to take temporary command. His orders were that a new attack was to be launched on W Hills, using a brigade from the ANZACs on his right, and the 2nd Mounted Division of Yeomanry, which was on its way from Egypt. To these were added the 11th Division and the 29th Division from Helles. The attack was mounted on 21st August and lasted six days, but by 27th it was obviously a total failure. Hamilton now demanded more reinforcements, but Kitchener could send only 25,000 more men. In addition Hamilton was ordered to send a division to Salonika to help defend Greece from a Bulgarian invasion, Bulgaria having finally decided to join Germany and Austria. In addition to these problems, the remains of the 2nd Mounted Division had to return to Egypt owing to the high rate of sickness. Although by this time there were 100,000 troops left in Gallipoli, 50,000 were sick and unfit for duty, mostly with dysentery and diarrhoea and were gradually being evacuated. The troops in Gallipoli now faced the prospect of winter storms, when the rain and floods pouring down the ravines and gullies would swamp the trenches, and the men (who still lacked winter clothing) would be exposed to the miseries of freezing temperatures. There was little prospect of doing anything more than holding on. Meanwhile, Bulgaria had entered the war on the side of Germany and Austria on September 6th 1915, which meant that increased supplies of guns and shells could be brought into the peninsula by the Germans through Bulgaia.
The 1st Devon Yeomanry, part of the 1st/2nd South-West Mounted Brigade, 13th Division, were among the dismounted Yeomanry battalions who arrived in early October to replace the 2nd Mounted Division that had returned to Egypt. The Brigade had travelled direct in the Olympic (sister ship to the Titanic) from Liverpool to Mudros. There were strong rumours that they were to take part in a new big push, an entirely new landing to be made at Bulair, way above the narrows in order to cut off the entire Turkish force from their supply route from Constantinople. However, by September the character of the fighting had completely changed and the operation was cancelled. It was as if an absolute weariness had set in on both sides after so much slaughter. There was of course on both sides constant sniping and shelling, but at the same time there was now a readiness to live and let live above ground, while below ground deeper dugouts and communication tunnels were dug together with some limited mining activity. Dysentery, diarrhoea and enteric fever were widespread after the August battles, made even worse by a continuous diet of tinned bully-beef, plum jam and hard biscuit. There was very little fruit or vegetables, no condensed milk or arrowroot, inadequate purification of water and a constant plague of loathsome flies. On all fronts there was a sense of purposelessness and boredom.
In early October winter storms damaged the landing stages at Suvla, making it even more difficult to land the winter stores and protective clothing. There were further gales in November, but then from the 26th November the war diary of the 1st Devon Yeomanry, together with all the other the war diaries at Suvla illustrate the terrible experience that was to burst upon the troops. Severe thunderstorms, torrents of freezing rain and strong gales flooded the trenches, and indeed drowned many men. The gullies were blocked with the corpses of men and mules. Supplies, equipment, rifles and stores were all washed away in the floods and many men simply died of exposure. By evening the weather worsened with a snow blizzard and intense cold, which continued during the night of 27th-28th. In all.280 men died on the peninsula as well as 16,000 cases of severe frostbite. Turks and allies alike walked about on top of the flooded trenches, the basic necessities of food and some warmth taking priority over all other cares. The Indians and Gurkhas suffered perhaps the worst of all, but many had the horrific experience of seeing the faces of dead comrades staring up at them through the ice in the frozen floor of their trench.
Faced with the growing criticism of Hamilton in London, and the seemingly unending disappointments and stalemate in face of the onset of winter, the war cabinet had begun to think seriously of evacuation. On 11th October Kitchener angered Hamilton by asking him to provide an estimate of losses in case of evacuation. Hamilton considered that 50% of the force would be killed or wounded making such an attempt, and he strongly advised against it. As a result on the 14th November he was recalled home, replaced by General Sir Charles Monro who quickly summed up the situation and advised withdrawal, finally cancelling all plans for a possible attack at Bulair with no possibility of any further success. Kitchener himself finally came out to Mudos to confer with Birdwood and Monro and General Maxwell who was in charge of all the allied forces in Egypt, and to tour the peninsula. He advised the war cabinet to order evacuation from Suvla and ANZAC, but to retain a force at Helles for political reasons. Monro was made supreme commander over Birdwood both at Gallipoli and Salonika, and the War Cabinet finally authorized the evacuation of Anzac and Suvla on 7th December.
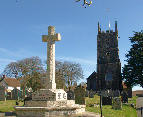
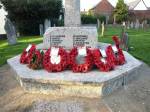
The actual evacuation from Suvla and ANZAC over Christmas and from Helles on 8th/9th January, virtually without casualties, was a miracle of good luck, perfect weather and brilliant organization. 35,268 men, 3,689 horses and mules, 214 guns, 328 vehicles and 1,600 tons of stores were shipped away without loss. 508 mules were quietly put to death, 1,590 vehicles were left behind together with huge stores of supplies. Ammunition was thrown into the sea and as the final boats left the shore the remainder was exploded. At the end of it all the Empire casualties amounted to some 37,000 dead, 83,000 wounded or sick. Of the dead 25,200 came from Great Britain and Ireland, 7,300 from Australia, 2,400 from New Zealand, 1,700 from India and 22 from Newfoundland. The French lost 47,000 killed and wounded. Turkish casualties are more difficult to estimate, but it is said that some 350,000 had been killed or wounded. Nothing had been achieved to further the war effort. Instead, Turkish morale had received a huge boost, witnessed by the explosion of joy and relief in Constantinople, and there was now no possibility of Turkey withdrawing from the war before the defeat of Germany. It was not until the campaigns in Mesopotamia and Palestine had finally defeated Turkey that their part in the war ended, and that only after the most fearful losses on both sides.